Author: admin

Savoury Winter Pies

Savoury Winter Pies

This week I have been a little obsessed with pies! Not the sweet, dessert variety so often baked during the festive season, but the hearty, five food groups (almost) dressed in flaky pastry variety!  Maybe it’s the Australian in me but I love a meat pie, and 

Thanksgiving Turkey, Stuffing & Gravy

Thanksgiving Turkey, Stuffing & Gravy

Thanksgiving Day is a national holiday celebrated in America, Canada and in some of the Caribbean islands.  The “first Thanksgiving,” however, was not a feast or a holiday, it was a simple gathering. Following the Mayflower’s arrival at Plymouth Rock on December 11, 1620, the Pilgrims lost 

My Mother’s Luxurious Christmas Cake

My Mother’s Luxurious Christmas Cake

This is probably one of my most cherished recipes.  If I close my eyes and inhale the aromas exuding from this cake, I can take myself back in time and imagine my mother lovingly unwrapping her Christmas Cake to feed it with brandy in the lead up to Christmas. I made an easier and smaller  Christmas Cake last year and while there are many quicker recipes to be found for Christmas or ‘Fruit’ Cake, to make this recipe is a labour of love that will reward you for months long after Christmas has passed. 

Ideally, a Christmas Cake should be made at least 2 months before Christmas. The reason for making it so early is to ensure that the flavours of all the dried fruits baked together with all the other ingredients has time to mature. Ideally, a Christmas cake should be fed at regular intervals with a little brandy or rum leading up to Christmas. This produces a deep, moist, rich-flavoured cake. It makes sense then that the earlier you make it, the better it will be.

Preparing the cake tin is another labour of love but is essential in ensuring a beautifully baked Christmas Cake.  Line a 10″ square cake tin with two layers of heavy brown packing paper, and two layers of baking paper.  All this paper acts as an insulator and prevents the cake from burning on the outside.  Some people line the inside of the tin with the baking paper, and then wrap the outside of the tin with the packing paper.  I lined the inside of the tin with both papers.  


The oven temperature is low and that is because the cake needs a long slow bake. It is filled with sugars, fruits and brandy and if the temperature is any higher the outside of the cake will burn and the inside be undercooked.

Luxurious Christmas Cake

  • 450g raisins
  • 450g sultanas
  • 450g currants
  • 225g glacè cherries
  • 225g mixed peel
  • 110g glacè pineapple
  • 125g dates
  • 125g prunes
  • 1 Granny Smith, grated
  • juice and zest of 1 lemon
  • juice and zest of 1 orange
  • 110g walnuts
  • 110g peeled almonds (+ extra for decoration)
  • 250ml brandy or rum
  • 450g butter
  • 225g brown sugar
  • 10 eggs
  • 450g Plain Flour
  • 125g S.R. Flour
  • 1 teaspoon allspice
  • 1  1/2 teaspoons cinnamon
  • 1 teaspoon nutmeg
  • 1 teaspoon salt
  • 1 teaspoon vanilla extract
  1. Put all the fruit, the orange & lemon juice with their zests in a very large bowl and stir in the brandy. Cover with a cloth and leave to soak for a minimum of 12 hours.
  2. In an electric mixer, cream the butter and sugar together and then add the eggs, one at a time.
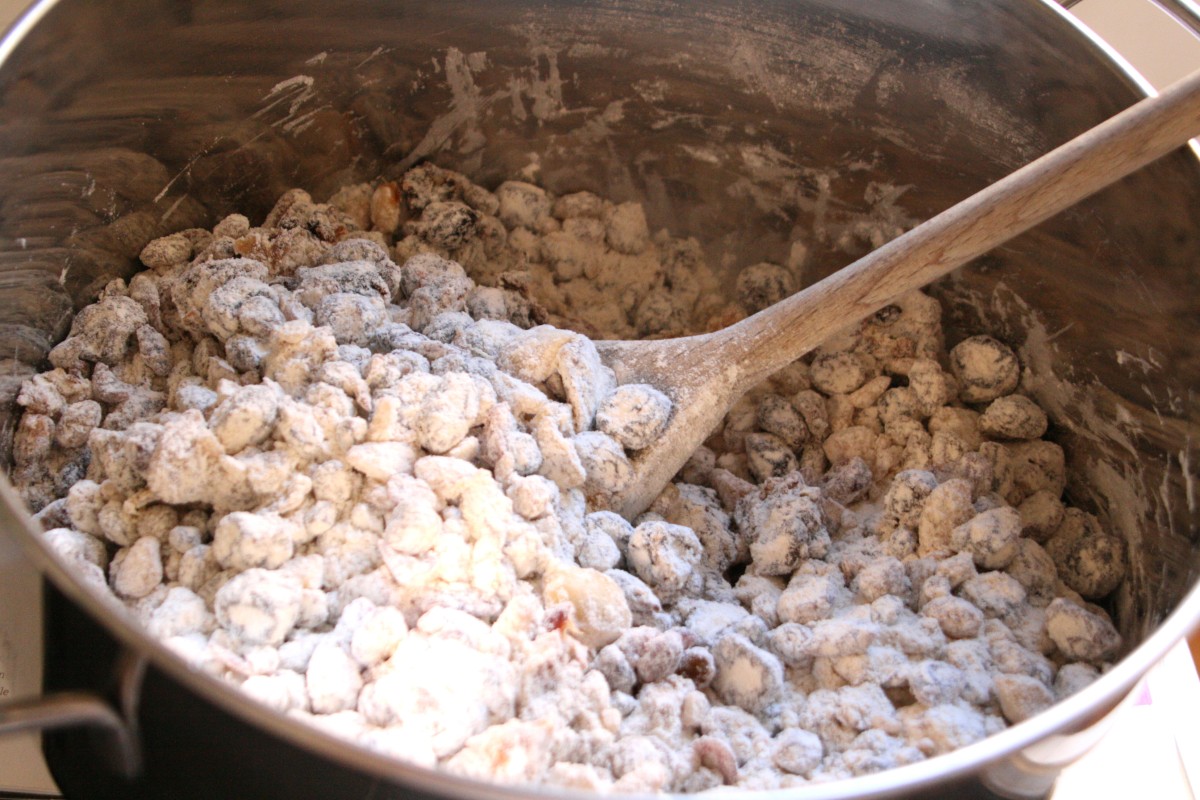
  3. Sift the flour, salt and spices and add to the fruit. Stir well with a wooden spoon to cover all the fruit with the flour.  Add the walnuts and almonds.
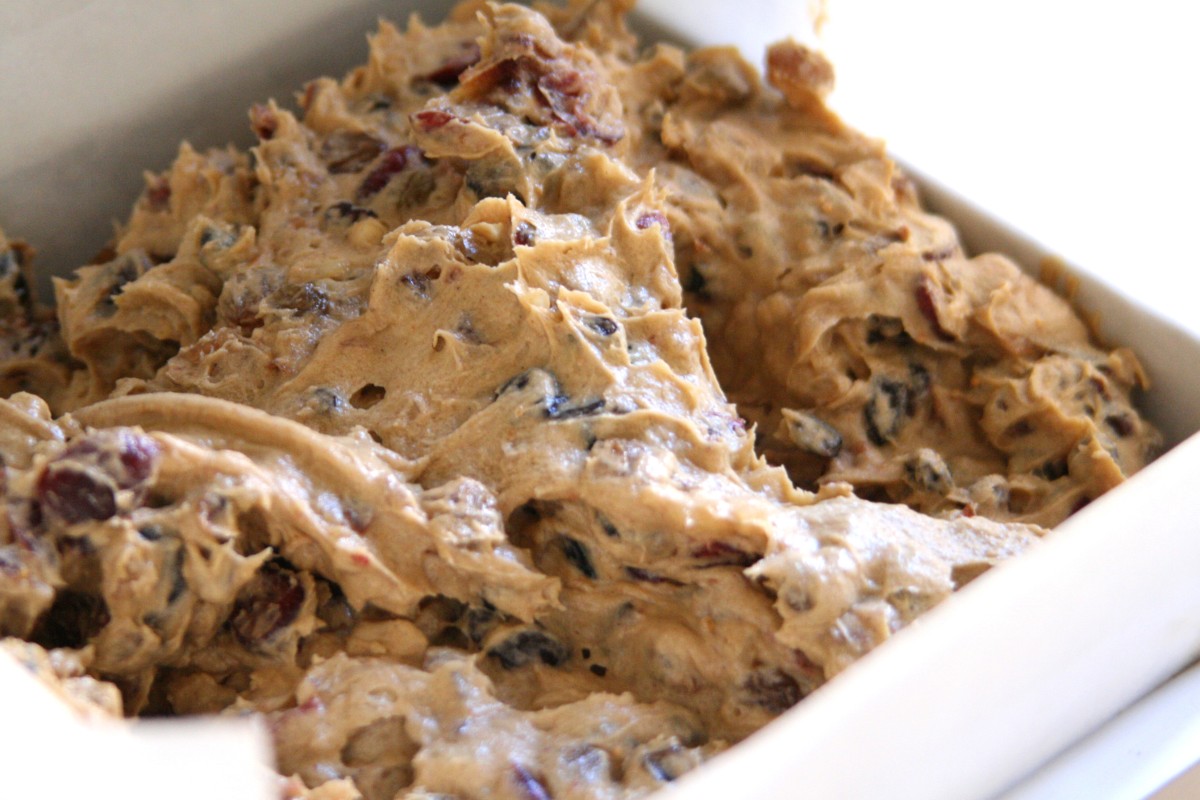
  4. Add the butter, sugar and egg mixture to the flour and fruit. Stir by hand or with hand held electric beaters.  (The mixture will be too much for a regular sized electric mixer).  Mix until mixture is well combined.
  5. Transfer the cake mixture into the prepared tin, spread it out evenly with the back of a spoon and, decorate the surface with extra almonds.  Using the spoon, create a little crater in the middle of the cake. This will rise back up again during cooking and create a smooth flat surface.
  6. Cut a square of packing paper and cut a hole in the centre (for extra protection during the cooking) and place this not on top of the rim of the brown paper. (see photo*). (Remove this from the cake after 5 hours of baking.)
  7. Place the cake in the oven at 180°C for 5 minutes and then reduce oven to 120°C and bake the cake on the lowest shelf of the oven for 6 hours until it feels springy in the centre when lightly touched. The cake should be nicely risen and a deep brown all over. Insert a skewer into the centre of the cake and if it is clean, the cake can be removed from the oven.
  8. Leave the cake to cool in the tin on a wire rack for an hour.  Prick the surface of the cake with a skewer and feed the cake for the first time while the cake is still warm. The amount of alcohol for the first feeding should equal the amount that the fruit first soaked in, that is 250ml. Allow to cool for another hour and then remove the cake from the tin and leave to cool completely.  The cake should be fed with 2 – 3 tablespoons of brandy every week until Christmas.The cake should be wrapped in plastic kitchen wrap and then in kitchen foil, and can be stored in a cake tin.


Torta di Natale Inglese – Ricetta della mia Madre

Questa è probabilmente una delle ricette che amo di più. Se chiudo gli occhi, e respiro il profumo di questa torta, riesco a tornare indietro nel tempo e immagino mia madre che spacchetta la sua Torta di Natale per aromatizzarla al brandy in vista di Natale. Ho fatto una Torta di natale più semplice e piccola l’anno scorso ed anche se ci sono tante ricette più veloci per torte di Natale, o di Frutta, preparare questa di ricetta è un atto d’amore che vi ripagherà per mesi dopo che è passato Natale.

Teoricamente, la Torta di Natale dovrebbe essere fatta 2 mesi prima di Natale. Il perché deriva dall’essere sicuri che tutti i sapori della frutta secca cotti insieme agli altri ingredienti abbiano tempo di maturare insieme. Teoricamente, la Torta di Natale dovrebbe essere irrorata a intervalli regolari con un po’ di brandy o rum fino a sotto Natale. Facendo ciò, si avrà una torta ricca di sapori e profumi. Pertanto, prima la si fa, meglio sarà.

La preparazione della Torta è un altro atto di amore vero e proprio ma alla fine assicura una torta perfetta. Ricoprite una teglia quadrata di 30 cm con due fogli di carta da pacchi marrone, e due fogli di carta da forno. Tutta questa carta serve da isolante e previene che la torta si bruci all’esterno. Alcuni foderano l’interno con carta da forno, e poi avvolgono l’esterno della teglia con la carta da pacchi, ma io preferisco mettere entrambe all’interno.

Il forno deve essere basso, perché la torta richiede una lunga cottura. Essendo composta da zucchero, frutta e brandy una temperatura alta brucerebbe l’esterno e lascerebbe poco cotto l’interno.

Ingredienti:

  • 450g uva bionda
  • 450g uva sultanina
  • 450g uva di Corinto
  • 225g ciliege glacè ‘sciroppate’
  • 110g ananas candite
  • 125g datteri
  • 125g prugne
  • 1 mela (granny smith) grattugiato
  • succo & scorza di 1 limone
  • succo & scorza di 1 arancia
  • 225g canditi
  • 250ml brandy o rum
  • 450g Farina ’00’
  • 125g Farina autolievetante
  • 10 uova
  • 110g walnuts – noci
  • 110g mandorle
  • 450g burro
  • 1 cucchiaino ‘allspice’  – spezie misto
  • 1 1/2 cucchiaino cannella
  • 1 cucchiaino noce moscato
  • 1 cucchiaino sale
  • 1 cucchiaino estratto di vaniglia
  1. Mettete tutta la frutta, le arance e il succo di limone con le bucce in una bacinella larga e mescolate col brandy. Coprite con un panno e lasciate riposare per almeno 12 ore.
  2. In un mixer elettrico, mescolate a crema burro e zucchero insieme e aggiungete le uova una alla volta.
  3. Stecciate farina, zucchero e spezie e aggiungete alla frutta. Mescolate bene con un cucchiaio di legno e coprite tutta la frutta con la farina. Aggiungete mandorle e nocciole. 4.jpg
  4. Aggiungete la miscela di burro, zucchero e uova alla farine e alla frutta. Mescolate a mano o con la frusta elettrica. (L’impasto è troppo per un normale mixer).7
  5. Trasferite l’impasto nella teglia, spargetelo bene col dorso di un cucchiaio e decorate il sopra con altre mandorle. Usando il cucchiaio, create un piccolo cratere in mezzo all’impasto, dato che lo stesso crescerà in cottura e così si avrà un impasto cotto liscio e piano.
  6. Tagliate un quadrato di carta da pacchi con un buco al centro (per protezione extra in cottura) e ponetelo sulla sommità della torta (vedi foto). (Toglietelo dopo 5 ore di cottura.)img_9787-trim
  7. Ponete la torta in forno a 180°C per 5 minuti e poi riducete la temperatura a 120°C e cuocete la torta nel ripiano più basso del forno per 6 ore fino a che non risulti cresciuta nel mezzo, toccandola gentilmente. La torta risulterà cresciuta e di un bel marrone scuro. Inserite uno stecchino nella torta e se fuoriesce pulito la torta potrà essere sfornata.
  8. Lasciate la torta raffreddare nella teglia su una griglia per un’ora. Bucherellate la torta e alimentatela per la prima volta finché è ancora tiepida. La quantità di alcool  per la prima volta deve essere pari a quanto assorbito dalla frutta, ovvero 250 ml. Lasciate raffreddare per un’altra ora e poi rimuovetela dalla teglia e lasciatela raffreddare completamente. La torta deve essere alimentata da circa 2-3 cucchiaini di brandy ogni settimana fino a Natale (rispirare forte e godere i profumi di Natale).  Durante tutto il periodo, la torta deve essere avvolta in pellicola trasparente e poi in carta alluminio e può essere conservata nella teglia.


Shallot & Pancetta Tarte Tatin with Rosemary

Shallot & Pancetta Tarte Tatin with Rosemary

This recipe is such a vintage favourite of mine and one that I would often make when I was living in London where I worked as a nanny.  It is lovely for lunch eaten with a leafy green salad, or in winter, the flavours marry well alongside a classic 

Pumpkin Gnocchi

Pumpkin Gnocchi

Pumpkins are wonderful to use in the kitchen during Autumn but the key is to find a good flavoursome pumpkin. It is perfectly acceptable to use cooked, canned pumpkin for this recipe which also means you can make it throughout the year. It is better 

Pumpkin Cheesecake

Pumpkin Cheesecake

c

I am welcoming Autumn this year by celebrating the pumpkin, which is one of my favourite vegetables.  I love it in the many ways it can be cooked, both savoury and sweet recipes.  So whether you love a comforting bowl of Pumpkin Soup or a traditional American Pumpkin Pie , if you buy a pumpkin full of flavour you’re already halfway there to recipe success.

This recipe is a combination therefore of two things I love, a baked Cheesecake and pumpkin.  I have actually cut back by more than half the sugar from the original recipe.  I found the originaly recipe too sickly sweet, and I have also reduced the quantity of spices.  I think I have found a nice equilibrium of flavours although don’t be fooled, it remains a rich dessert and a small piece should satisfy any dessert craving. 

**I have improved the previous recipe that was posted of this cheesecake, by adding a caramel layer on top.

m

Pumpkin Cheesecake

Crust

  • 400g  finely crushed biscuits. eg: Digestives
  • 180g melted unsalted butter
  • 1 egg white

Filling

  • 425g sweet Pumpkin flesh, steamed and pureed.  (I used a can of American brand Libby’s to avoid disappointment from buying a flavourless pumpkin).
  • 50g dark Brown Sugar
  • 50g Caster Sugar
  • 1/2 teaspoon Mixed Spice (cinnamon, nutmeg, ginger & cloves)
  • 1/2 teaspoon Salt
  • 180g Sour Cream
  • 680g Cream Cheese
  • 5 large Eggs
  • Pecan Nuts (about 40 for decoration)
  1. Preheat oven to 180°C.
  2. To prepare the crust, pulse the biscuits in a food processor until finely ground. Stir in the melted butter and mix well to combine. Butter your cake tin, using either a springform tin or a deep tart case with a removable bottom. (diameter 9″ 22cm).
  3. Place the biscuit crumb mixture into the base and use your fingers to work it up the sides of the cake tin, pushing it against the sides.  Next use the bottom of a glass or a cake smoother to press it all into an even layer along the base.  Bake for 10 minutes. Remove from the oven, brush with egg white and bake for another 3 mins (this will help stop the base from becoming soggy).
  4. To the bowl of your electric mixer, add the pumpkin, sugars, spices and salt. Stir to combine.
  5. Add the sour cream and mix until incorporated.
  6. Add the cream cheese a little at a time, mixing well after each addition.
  7. Add the eggs, and mix on medium high until all eggs are incorporated and mixture is smooth and uniform in colour.
  8. Pour the filling into the prepared cake tin and place into the oven on the wire rack tray, in the middle of your oven.   Fill the flat oven shelf with hot water and place at  the bottom of the oven, underneath the cheesecake. (This helps to avoid cheesecakes cracking on the surface. Some new ovens have a steam option incorporated).
  9. Bake for 1  1/2 hours, until the cheesecake is set. Turn off the oven, and leave cheesecake in oven with the door slightly open until it has cooled completely.  Cover the cheesecake with plastic wrap and refrigerate overnight.

OPTIONAL:  If you don’t want to make the caramel, you can sprinkle the top of the cheesecake with a generous amount of fine white caster sugar to create a ‘creme brulèe’ like top.  You can place the cheesecake under the grill until the sugar caramelises, or use a culinary kitchen torch. Decorate with Pecan Nuts. 

CARAMEL

  • 1/2 cup / 125ml water
  • 1 cup / 225g white sugar
  • 1 cup / 250ml cream (room temp)
  • 1 teaspoon vanilla extract
  1. Add the vanilla extract to the cream.
  2. Pour the water and sugar into a deep, heavy-bottomed saucepan. Swirl the saucepan gently to ensure all the sugar is covered by the water and that the sugar is sitting in a fairly flat and even layer. Avoid splashing up the sides of the saucepan.
  3. Heat over a medium heat for about 6 to 8 minutes. The sugar will start to melt and it will simmer. DO NOT STIR the mixture. Just be patient and watch it closely and eventually the sugary syrup will become a honey colour, and then soon after amber coloured.
  4. Remove the pan from the heat and carefully add the cream. The mixture will bubble up vigorously, but keep stirring until the cream is incorporated and the caramel is smooth. Allow to cool a little before spooning it over the top of the cheesecake. Add the pecan nuts on top of the caramel and refrigerate the cheesecake until it is ready to be served.
  • Place extra caramel in a small jug so you can add a little extra to each slice when serving.
l

CHEESECAKE ALLA ZUCCA

Questa ricetta è una combinazione di due cose che amo, una cheesecake al forno e la zucca. Io però ho ridotto più della metà lo zucchero della ricetta originale. Ho trovato la ricetta originale troppo zuccherosa e speziata, e pertanto ho ridotto anche le spezie previste. Credo di aver trovato un buon equilibrio di sapori, sebbene, ovviamente, questo resta un dolce ricco e basta già una piccola fetta a soddisfare ogni richiesta.

**Ho migliorato la ricetta precedente che è stata pubblicata, aggiungendo uno strato di caramello sopra.

INGREDIENTI

Base

  • 400g  di biscotti finemente tritati . eg: Digestive
  • 180g di burro fuso
  • 1 albumen d’uovo

Ripieno

  • 425g Zucca, cotta a purèe
  • 50g zucchero di canna scuro
  • 50g zucchero semolato
  • 1/2 cucchiaino spezie miste (cannella, noce moscato, zenzero)
  • 1/2 cucchiaino sale
  • 180g panna acida
  • 680g formaggio spalmabile (tipo Philadelphia)
  • 5 uova grandi
  • Noci Pecan (circa 40 per la decorazione)

Preriscaldare il forno a 180°C.

  1. Per preparare la crosta, frullare i biscotti in un robot da cucina fino a macinarli finemente. Incorporare il burro fuso e mescolare bene per unire. Imburrare la tortiera, utilizzando uno stampo a cerniera o una tortiera profonda con fondo rimovibile. (diametro 9″ 22 cm).
  2. Posizionare il composto di biscotti nella base e utilizzare le dita per lavorarlo sui lati della tortiera, spingendolo contro i lati. Successivamente lisciare per creare uno strato uniforme lungo la base. Infornare per 10 minuti. Sfornare, spennellare con albume d’uovo e infornare per altri 3 minuti (questo aiuterà la base di rimanere asciutto).
  3. Lasciare raffreddare e preparare il ripieno.
  4. Nella ciotola della planetaria, aggiungete la zucca, gli zuccheri, le spezie e il sale. Mescolare per unire.
  5. Aggiungere la panna acida e mescolare fino a quando sarà incorporato.
  6. Aggiungere il formaggio spalmabile un po ‘alla volta, mescolando bene dopo ogni aggiunta.
  7. Aggiungere le uova, e mescolare a velocità medio-alta fino a quando tutte le uova saranno incorporate in un omposto liscio e omogeneo.
  8. Versare nello stampo sopra la base fatta di biscotti e mettere in forno sulla griglia, nel mezzo del forno. Riempire la teglia del forno con acqua calda e porla alla base del forno. (Ciò consente di evitare che la superficie si spacchi. Alcuni nuovi forni hanno una opzione di vapore incorporato che risolve il problema).
  9. Cuocere per 1 1/2 ore (90 min), fino a quando la cheesecake è ben cotta e soda. Spegnere il forno e lasciare la cheesecake in forno con la porta leggermente aperta fino a quando non si è raffreddata completamente. Coprire la torta con pellicola trasparente e farla riposare qualche ore in frigorifero.
  • Se non vuoi fare il caramello, puoi cospargere la parte superiore della cheesecake con una generosa quantità di zucchero semolato e utilizzando una torcia da cucina, puoi creare un effetto brulée.
  • Decorare con le Noci Pecan.

CARAMELLO

  • 120ml di acqua
  • 220g di zucchero bianco
  • 245ml di panna (temperatura ambiente)
  • 1 cucchiaino di estratto di vaniglia
  1. Aggiungere l’estratto di vaniglia alla panna.
  2. Versare l’acqua e lo zucchero in una casseruola profonda e dal fondo pesante. Ruotare delicatamente la casseruola per assicurare che tutto lo zucchero sia coperto dall’acqua e che lo zucchero si trovi in ​​uno strato abbastanza piatto e uniforme. Evita di schizzare i lati della pentola.
  3. Riscaldare a fuoco medio per circa 6-8 minuti. Lo zucchero inizierà a sciogliersi e inizierà a sobbollire. NON MESCOLARE la miscela. Basta avere pazienza e guardarlo da vicino e alla fine lo sciroppo zuccheroso diventerà un color miele, e poi dopo circa 5 minuti, color ambra.
  4. Togliere la padella dal fuoco e aggiungere con cura la panna. La miscela inzierà a bollire vigorosamente, ma continuare a mescolare finché la panna non sarà incorporata e il caramello sarà liscio. Lasciar raffreddare un pochino prima di metterlo con un cucchiaio sopra la cheesecake. Aggiungere le noci pecan sopra il caramello e conservare in frigorifero la cheesecake fino a quando non è pronta per essere servita.
  • Mettere del caramello extra in una piccola brocca in modo da poter aggiungere un po’ di più a ogni fetta durante il servizio.
K.jpg
una fetta servita con dulce de leche
Spaghetti Cacio e Pepe

Spaghetti Cacio e Pepe

The first time Alberto took me out to lunch in Rome, he took me to Roscioli and even though I had lived in Italy for many years, it was actually the first time I had tasted ‘Cacio e Pepe’.   When made correctly it is a luxurious 

Pomodori col Riso

Pomodori col Riso

‘Pomodori col Riso’ are Tomatoes stuffed with rice. It is a dish traditional to Rome and its surroundings, and although usually found during the summer months, it can be made year round. It is a light and healthy meal, which can be eaten as an antipasto or as a 

Chocolate Sour Cream Cake

Chocolate Sour Cream Cake

A-trim.jpg

This recipe was one from my mother’s repertoire, and the page it’s written on in my recipe book is the dirtiest page in the whole book.  It shares the page with the Chocolate Self-Saucing Pudding… and between the two the cocoa smudged pages are a testament to how popular both these recipes are.  This is a great chocolate cake for everyone.  It’s not heavy like a mudcake, and it also doesn’t have a ‘dark chocolate’ richness.  It’s more a classic milk chocolate cake perfect to staisfy those ‘everyday’ chocolate cake cravings.

I iced the cake with a delicious and luxurious buttercream frosting with philadelphia cream cheese, sour cream, and rich dark chocolate.  I tried to give the cake an Autumn feel on the top of the cake by decorating it with simple chocolate sugar cookies which were sprinkled with Matcha Tea and coloured petal dusts.

*My mother’s recipe doesn’t use cocoa, but I usually add about 30g which is 1/4 Cup.

Chocolate Sour Cream Cake

  • 125ml warm water
  • 230g sour cream (1 Cup)
  • 100g caster sugar (1/2 Cup)
  • 100g dark brown sugar  (1/2 Cup)
  • 1 teaspoon bicarb soda
  • 90g dark chocolate (chopped)
  • 125g butter
  • 1  1/2 teaspoon baking powder
  • 250g plain flour (2 Cups)
  • *30g cocoa (not in original recipe)
  • 3 eggs
  • 2 teaspoon vanilla extract
  • pinch salt
  1. Butter and line a 9″ (23cm) cake tin. Pre-heat oven to 180°C.
  2. Place chocolate and water in a glass bowl and melt together in a microwave oven, then stir in the sour cream.  Mix by hand until well combined.
  3. In an electric mixer, beat the butter and sugars together until combined.
  4. Add eggs, one at a time, then beat in the vanilla extract.
  5. Add sifted dry ingredients alternatively with the chocolate and cream mixture.
  6. Pour mixture into prepared cake tin, and bake for 1 hour to 1 hour 15 minutes, or until an inserted cake skewer comes out clean.
  7. Remove cake from tin and allow to cool completely before icing with Chocolate Frosting.

k


Luxurious Chocolate Frosting

  • 280g Icing Sugar  (confectioners sugar)
  • 30g cocoa powder
  • 170g cream cheese
  • 170g butter, room temperature
  • pinch salt
  • 255g dark chocolate, melted
  • 170g sour cream
  1. In an electric mixer, beat together the butter and cream cheese until smooth.
  2. Sift together sugar, cocoa and salt.  Add gradually to butter and cream cheese and beat until combined.
  3. With beaters on medium speed, pour in melted chocolate.
  4. Add sour cream, beating until smooth and well combined.
  5. This may need to be refrigerated a little if making this in the summer and you wish to use it with a piping bag.

f

TORTA DI CIOCCOLATO CON LA PANNA ACIDA

Questa ricetta me l’ha tramandata mia madre, e la pagina dove è scritta, nel mio libro di ricette, è la pagina più sporca in tutto il libro… Nella stessa pagina c’è un’altra ricetta cioccolatosa, e sopra le pagine il cacao sbavato è la testimonianza di quanto sia stata seguita questa ricetta. Questa è una torta al cioccolato per tutti. Non è pesante come un mudcake, e inoltre non ha un sapore pesante di ‘cioccolato fondente’. E’ perfetta per soddisfare la “vera” voglia di torta al cioccolato, o per qualsiasi merenda!
Ho glassata la torta con un deliziosa e lussuriosa glassa al burro di formaggio spalmabile ‘philadelphia’, panna acida e cioccolato fondente. Ho cercato di dare alla torta un tocco di  autunno decorandola con semplici biscotti di zucchero al cioccolato che sono stati cosparsi di Thè Matcha e polveri colorante che uso normalmente quando coloro i petali dei fiori di gumpaste.
* La ricetta di mia madre non fa uso di cacao, ma io di solito ne aggiungo circa 30g.

  • 125ml di acqua calda
  • 250ml panna acida
  • 100g di zucchero semolato
  • 90g di zucchero Muscovado
  • 1 cucchiaino di bicarbonato di soda
  • 1 / 2 cucchiaino di lievito in polvere
  • 90g di cioccolato fondente + 30g di cacao amaro*
  • 125g di burro
  • 220g di farina ’00’
  • 3 uova
  • 2 cucchiaini di estratto di vaniglia
  • pizzico di sale


  1. Preparare uno stampo di diametro 22cm e preriscaldare il forno a 180°C
  2. Sciogliere il cioccolato nel acqua (io lo faccio nel microonde).  Aggiungere la panna acida e mescolare a mano finchè il composto non è liscio e omogeneo.
  3. Nella planetaria, mescolare insieme il burro e gli zuccheri.
  4. Aggiungere le uova una alla volta, poi aggiungere la vaniglia
  5. Setacciare la farina insieme al sale, il cacao, bicarbonato di soda e il lievito e aggiungere tutto nella planetaria in due parti,  alternando con la miscela di cioccolato.
  6. Versare tutto dentro un stampo di diam 22cm e cuocere nel forno per 1 ora e 15min e togliere la torta dal forno quando, dopo averlo inserito, lo stecchino esce pulito e asciutto.

FROSTING AL CIOCCOLATO

  • 280g zucchero a velo
  • 30g cacao
  • 170g formaggio spalmabile (Philadelphia)
  • 170g burro, temperatura ambiente
  • pizzico di sale
  • 255g cioccolato fondente, sciolto
  • 170g panna acida


  1. In una planetaria, mescolare il burro e il formaggio spalmabile fino a che non sono bene amalgamati.
  2. Setacciare insieme lo zucchero, il cacao e il sale. Aggiungere lentamente al burro e formaggio e mescolare tutto bene.
  3. Con la planetaria a velocità media, aggiungere il cioccolato sciolto.
  4. Aggiungere la panna acida, continuando con la planetaria per ottenere una glassa liscia e omogeneo.
  5. Potrebbe essere necessario di refrigerare il composto se lavorate in estate e si desidera di utilizzarlo con la sac a poche.

c


Rocket, Pecorino & Walnut Salad

Rocket, Pecorino & Walnut Salad

Offer some people a salad and many would think of a boring bowl of lettuce to be eaten as a side dish or a sign you’re on a diet.  A salad doesn’t have to be boring and the word salad for me covers  a myriad of ingredient combinations.