Thanksgiving Day is a national holiday celebrated in America, Canada and in some of the Caribbean islands. The “first Thanksgiving,” however, was not a feast or a holiday, it was a simple gathering. Following the Mayflower’s arrival at Plymouth Rock on December 11, 1620, the Pilgrims lost 46 of their original 102 colonists. With the help of 91 Indians, the remaining Pilgrims survived the bitter winter and yielded a bountiful harvest in 1621. In celebration, a traditional English harvest festival, lasting three days brought the Pilgrims and natives to unite in a “thanksgiving” observance.
This ‘thanksgiving’ meal would not be celebrated again until 1676. On June 29 the community of Charlestown, Massachusetts proclaimed a day of thanksgiving for their good fortune. Ironically, this celebration excluded the Indians, as the colonists’ recognized their recent victory over the “heathen natives.” It wasn’t until 1789 that George Washington proclaimed it a National holiday. Lincoln proclaimed the last Thursday in November in 1863, but it wasn’t until 1941 that Congress sanctioned it as a legal holiday.
Obviously in Australia we don’t celebrate Thanksgiving, and I included a little about the origins of Thanksgiving because I am always surprised when people wish me Happy Thanksgiving.
I was asked to cater for an American friend’s Thanksgiving buffet dinner this year though. The menu included turkey, mashed pumpkin, mashed potato, peas, trays of green & black olive and pickles, and also raw carrot and celery sticks. For dessert I made six pies; 2 apple pies, 1 pumpkin pie, 1 lemon meringue pie, 1 blueberry pie and 1 pecan pie! I also made the traditional pull apart yeast bread rolls. My biggest concern for this buffet though was the turkey. It had to be big, but not too big that it wouldn’t fit in my oven. I was anxious about the preparation method, but also cooking times. I studied many recipes online, and asked many American friends for their advice and tips. I found it frustrating when searching online, and that is why I’ve decided to make your lives easier….. You’ll find everything you need to cook your turkey in a most authentic way for Thanksgiving. As turkey is synonymous with stuffing and why would you want to think of eating it without gravy, I’ve decided to share all THREE recipes in this one post. You’ll see how I achieved my perfectly cooked turkey, the stuffing recipe which was cooked separately, and also how to make an authentic and delicious gravy!
Please Note: COOKING TIME FOR TURKEY DEPENDS ON IT’S SIZE. CALCULATE 30 MINUTES FOR EVERY KILOGRAM. Your turkey is considered cooked (and therefore safe to eat) when a thermometer inserted into the thickest part of the thigh reaches a temperature of 165°F (74°C).
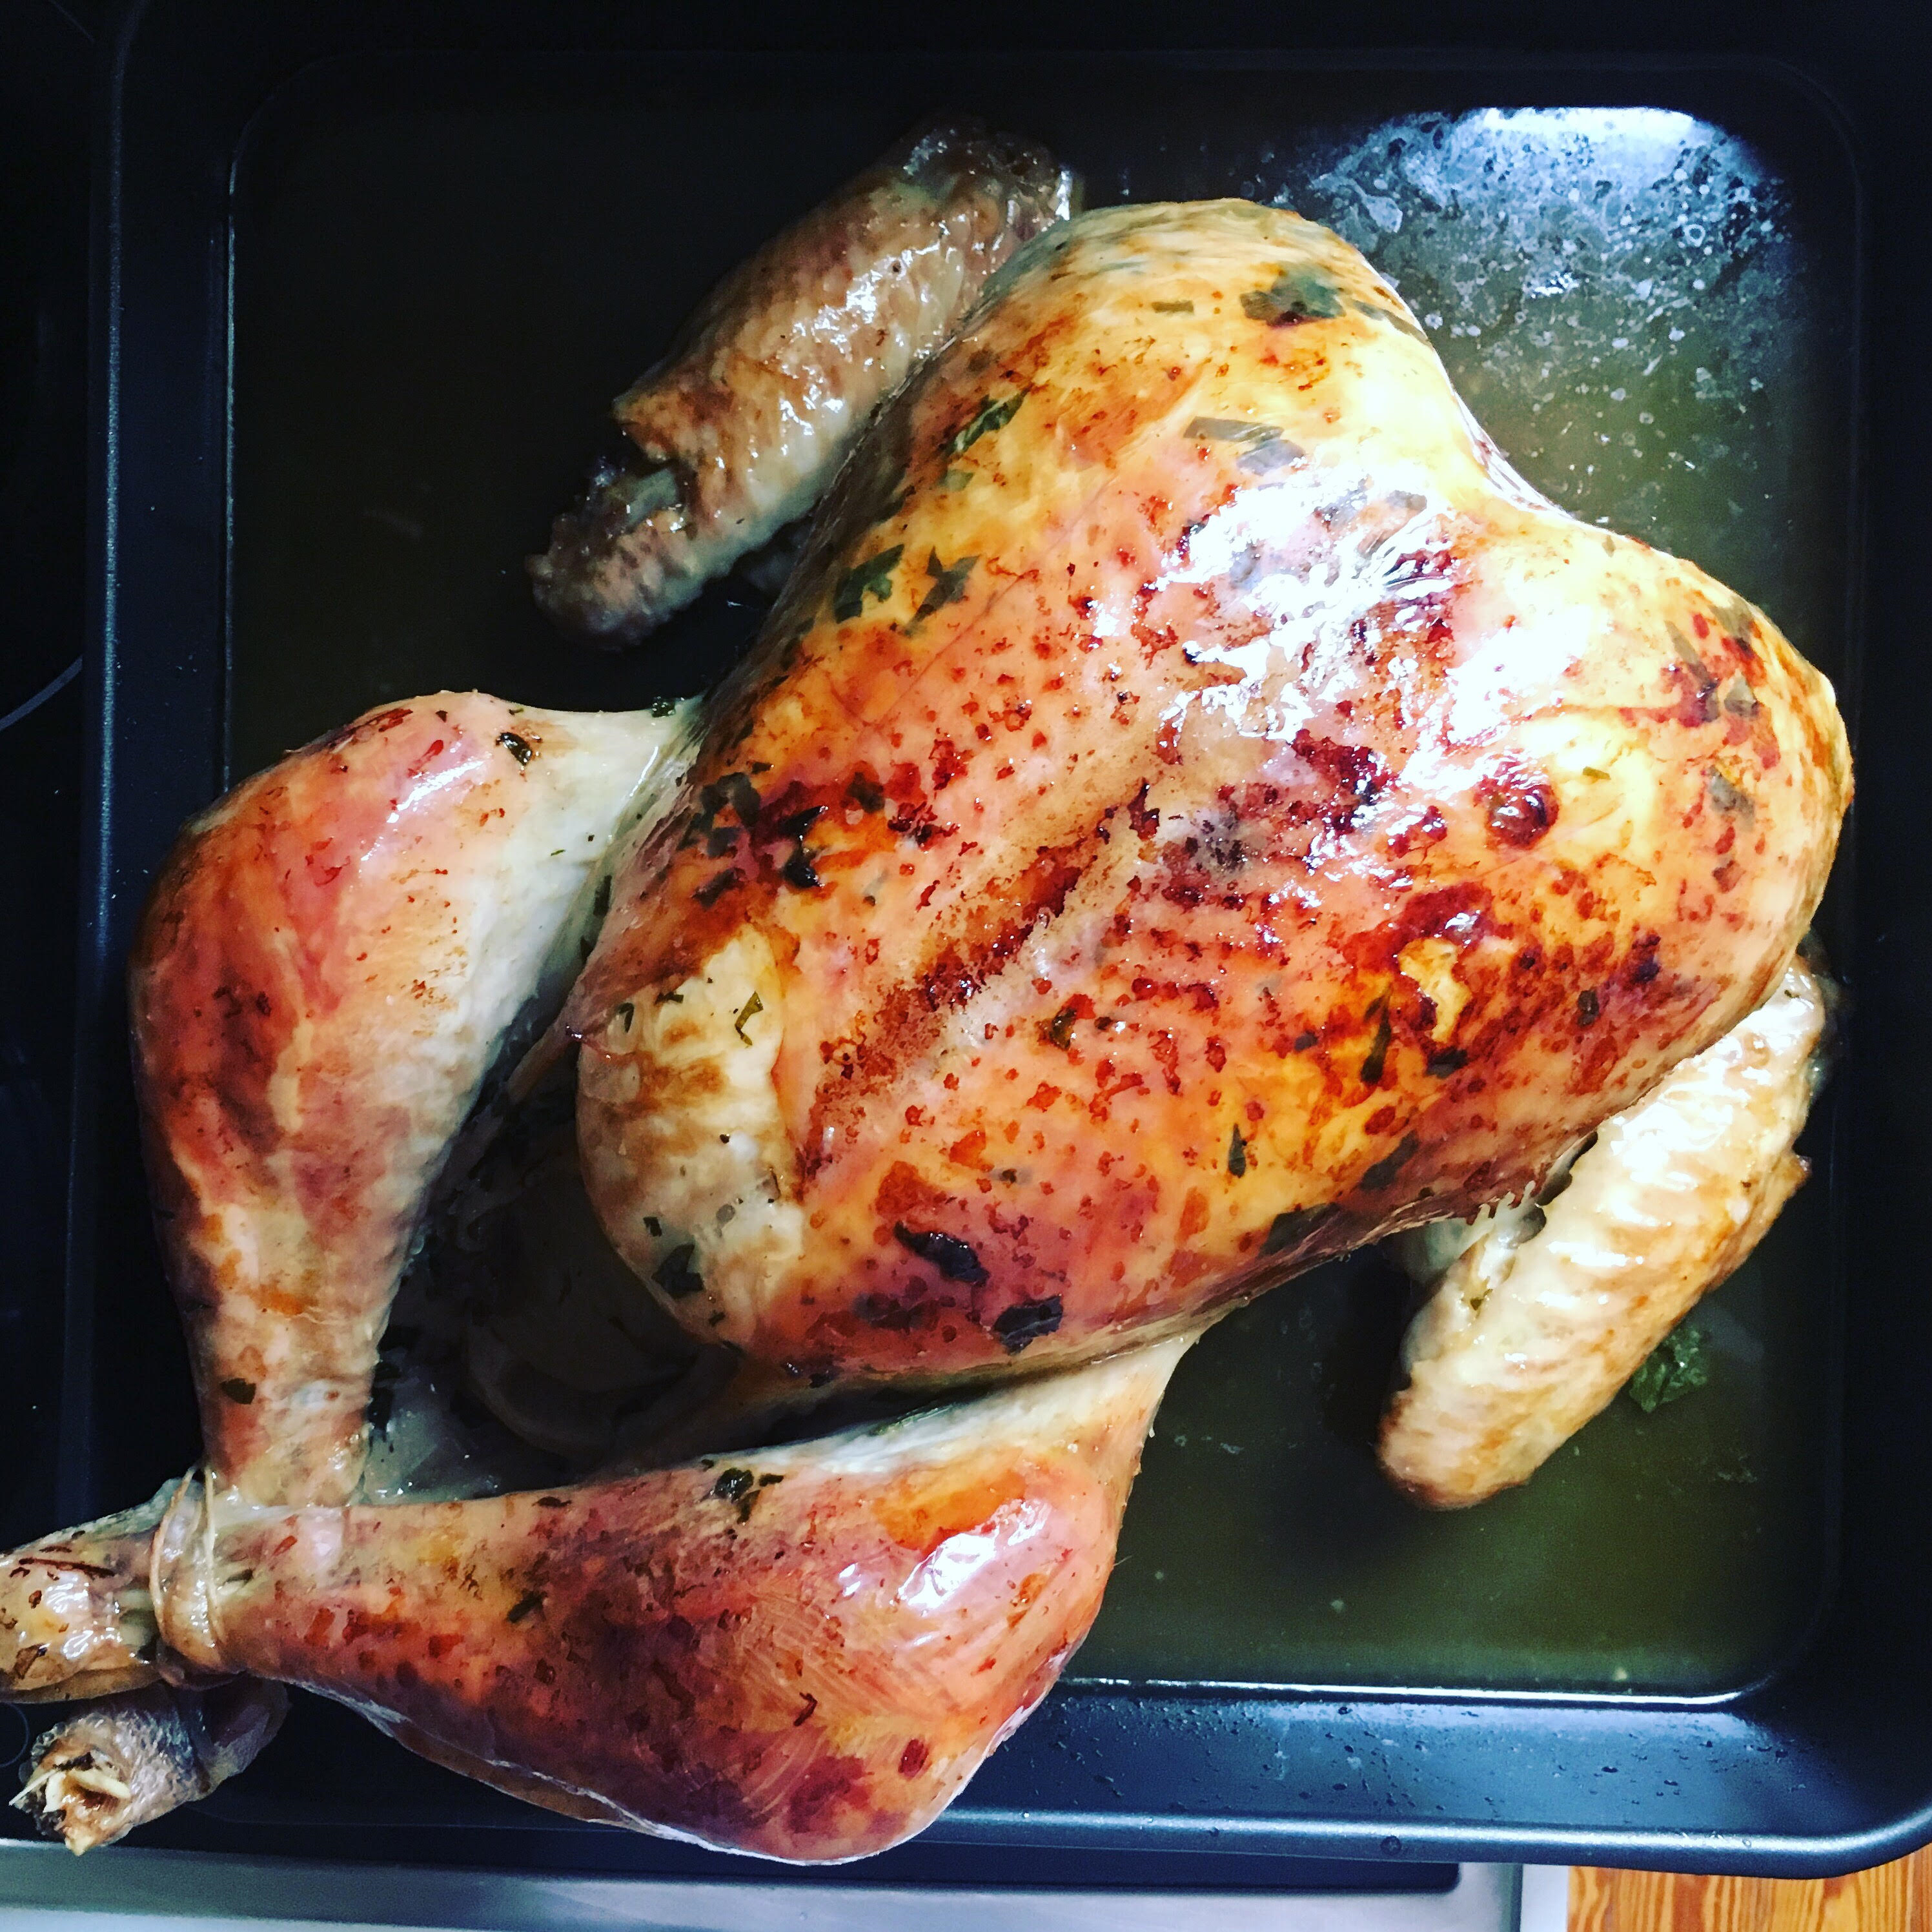
THANKSGIVING TURKEY
- Turkey – mine was 7.8kg = 17lb and was bought fresh from the specialist poultry man at my local market.
- 375g butter + 340g butter (measure separately)
- 2 tablespoons olive oil
- juice and zest of 2 lemons
- 3 garlic cloves, grated finely
- handful chopped parsley, chopped
- salt & pepper
- cheesecloth (muslin)
- 1 bottle white wine (750ml)
- FOR TURKEY CAVITY:
- 2 onions, cut in half
- 1 lemon, halved
- 2 bay leaves

- Ensure your turkey has sat at room temperature for a couple of hours and that the skin is dry and intact. Place in baking pan.
- Starting from the rear end, carefully run your fingers under the turkey skin and separate it from the breast meat. Work up as far as you can. Turn the turkey around and starting from the neck cavity, do the same thing lifting the skin until you have lifted the skin from the entire breast.
- Fold wing tips under turkey. (My poultry man did this for me at the market).
- In a bowl mix together 375g butter, olive oil, juice and zest of 2 lemons, garlic cloves, parsley, salt and pepper.
- Using your hands, remove a handful of butter mixture, start on one side, and lift the turkey skin from the rear end place the butter under the skin. Run your hand along the top of the skin, pushing the butter along the cavity created between the breast and the skin until the butter arrives at the neck end. Repeat on the other side and ensure the whole breast, under the skin is covered with the butter mixture.
- Continue using your hands, and massage butter mixture to the outside of the turkey, covering breast, legs and wings entirely. Sprinkle with salt and pepper.

- Preheat oven to 220°C.
- In a saucepan, melt on medium heat 340g butter with a bottle of white wine.
- Fold cheesecloth to ensure it has at least 4 layers, and it is enough to cover entire turkey. As my turkey was quite large, I used two separate pieces for this. Soak cheesecloth in melted butter and wine.
- Fill turkey cavity with onions, lemon, bay leaves, salt and pepper.
- Tie legs of turkey together with kitchen string to keep legs nice and close to body.
- Lift cheesecloth out of butter/wine liquid, and spread it evenly over turkey. Reserve butter/wine liquid for basting turkey.

- Place turkey in oven. Cook for 30 minutes. Using a baster, baste cheesecloth and then reduce oven temperature to 180°C. Continue to cook for 2 1/2 more hours, basting every 30 minutes. You can also baste with turkey juices and not just with remaining wine/butter liquid in saucepan. Occasionally turn baking pan around to change position of turkey in oven. This will allow for even cooking.

- After three hour of cooking, carefully remove and discard cheesecloth. Continue to cook, basting turkey with pan juices every 15-20minutes.
- After this fourth hour of cooking, insert an instant-read thermometer into the thickest part of the thigh. Do not poke into a bone. The temperature should reach 180 degrees and the turkey should be golden brown. If the turkey is not fully cooked, baste turkey, return to oven, and cook another 20 to 30 minutes.

- When fully cooked, remove lemon and onions from cavity and let turkey rest for at least 30 minutes but 2 hours is better. (Gordon Ramsay says that a turkey should rest for the same amount of time it took to cook)!
TURKEY STUFFING
(Thanks to Martha Stewart for this recipe)
*Although it is perfectly normal to stuff your turkey with stuffing, I decided to cook it separately.

- 170g butter
- 1 large loaf of day old rustic, crusty Italian bread, cut into cubes.
- 10 sage leaves, finely chopped
- 3 cups parsley, chopped
- 16 ribs of celery chopped into small pieces
- 4 medium onions chopped finely
- 2oog pecans or walnuts, chopped
- 150g fresh cranberries (Martha used dried fruit)
- 1.6 litres vegetable or chicken stock
- 2 teaspoons salt
- 4 teaspoons black pepper
- In a large frying pan, saute onions and celery in butter until translucent. Add fresh cranberries, add salt and pepper, Add 100ml stock to pan and continue to cook for a few minutes on low heat. If you are using dried fruit, you can add them directly to bread mixture.
- Place cubed bread in a large bowl, and pour 1.5 litres of stock over bread. Allow bread to soak up all liquid.
- Add chopped sage leaves, parsley and nuts to bread.
- Add celery, onions and cranberry mixture to bread and stir through gently.
- Pour into one large or two medium buttered baking dishes and cook at 180°C for 45 minutes.

GRAVY
- 1.5 litres stock (ALL Turkey juices + add stock to reach 1.5 litres)
- 3/4 cup fat drippings
- 125g (1 cup) + 2 tablespoons all-purpose flour
- Strain the liquid from the roasting pan and let rest until the fat rises to the top. Skim off the fat and place it into a separate bowl.
- Measure the liquid, and top it up with extra stock to achieve 1.5 litres.
- Take 180ml of the reserved fat and pour into a large saucepan over medium heat. Once the fat is nice and hot, add the flour and stir continuously. As the roux cooks, it will turn from a light color to a rich brown color. This will take about 10 to 15 minutes.
- Add about 1/3 of the stock and stir constantly. Stir and continue to add the stock until smooth. Once all of the stock has been added, check the consistency. Keep in mind that it will continue to thicken after you turn off the heat. If you like a thinner gravy, you may want to add more stock.
- For a super-smooth gravy, strain again before serving. Cover and keep the gravy hot while you carve the turkey. Reheat over low heat if necessary.